This is the article 80 Level did for my work, hope you like it!


This is the article 80 Level did for my work, hope you like it!
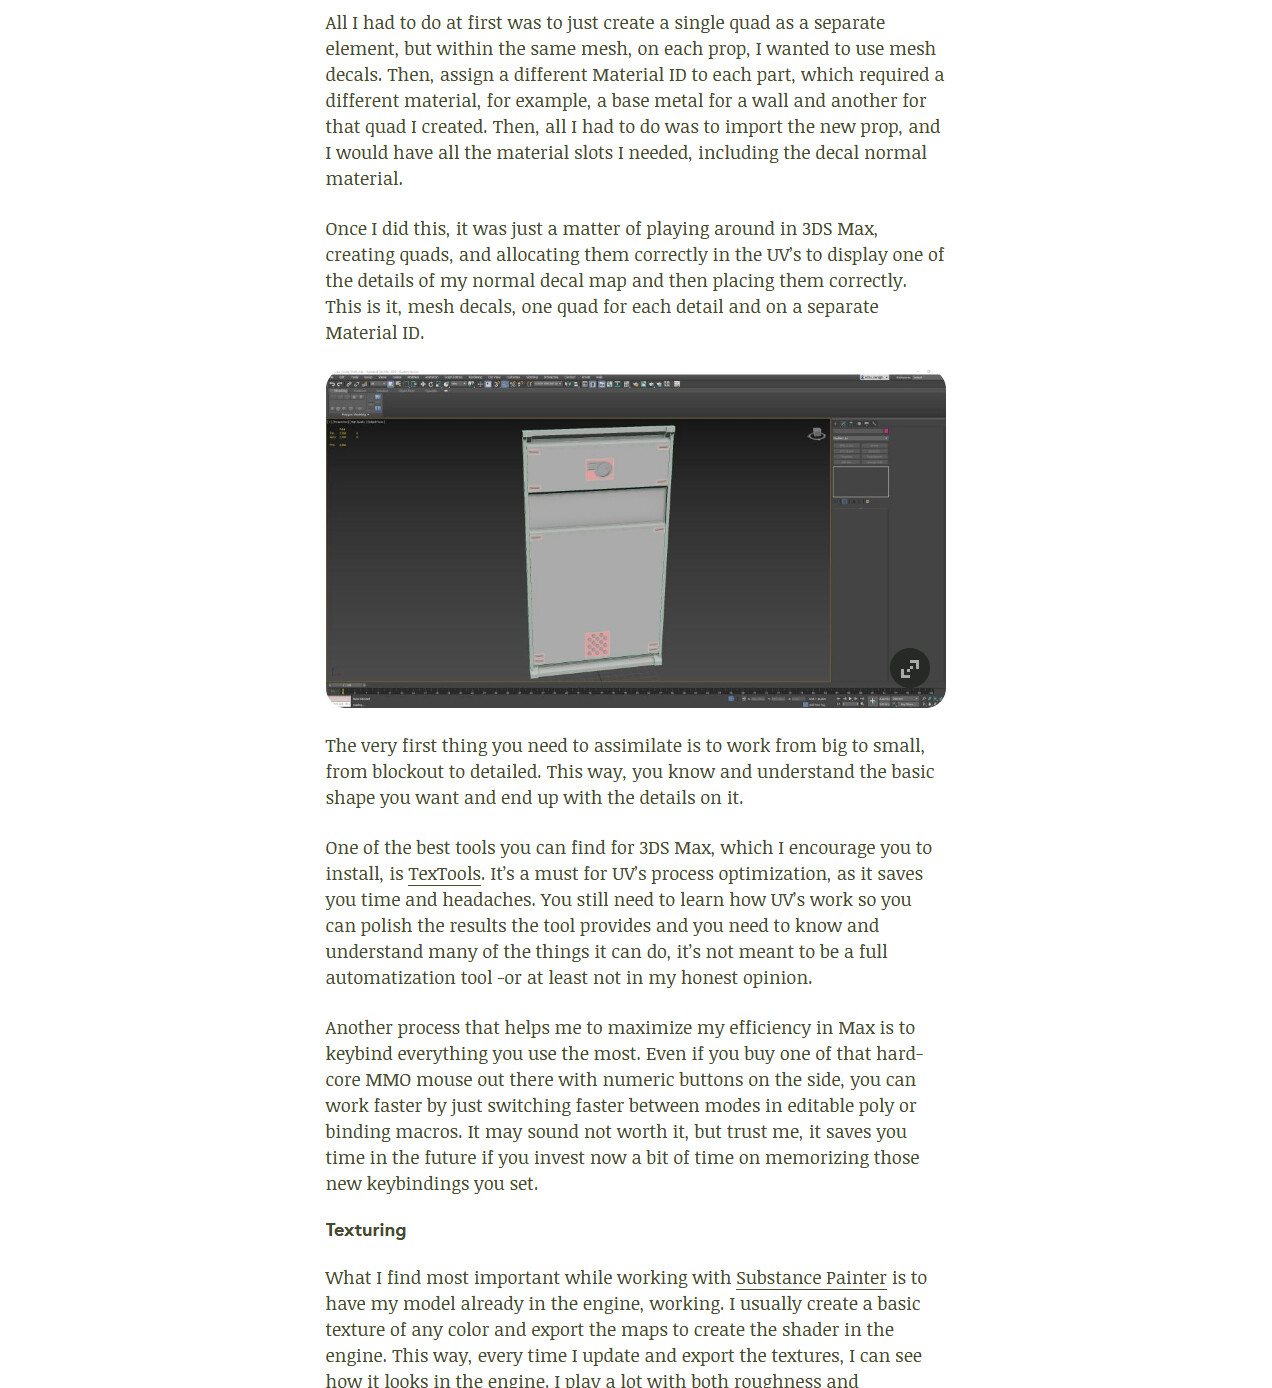
Hey guys, today I'm going to talk about floaters, their usage for high poly details and how to think of them in order to bake with good results.
First of all, let's explain a bit what are they good for, and what can you do on them. Floaters are the best way to resolve concavities and extruded details in places where inner and outer cage of bakes intersect with other faces. Also, when you don't want to get a mess of N-gons or a lot of edges on the high poly to avoid artifacts on bakes. As they will become floating elements inside SAME mesh or object, baking programs will interpret them as holes or extrusions of that main mesh.
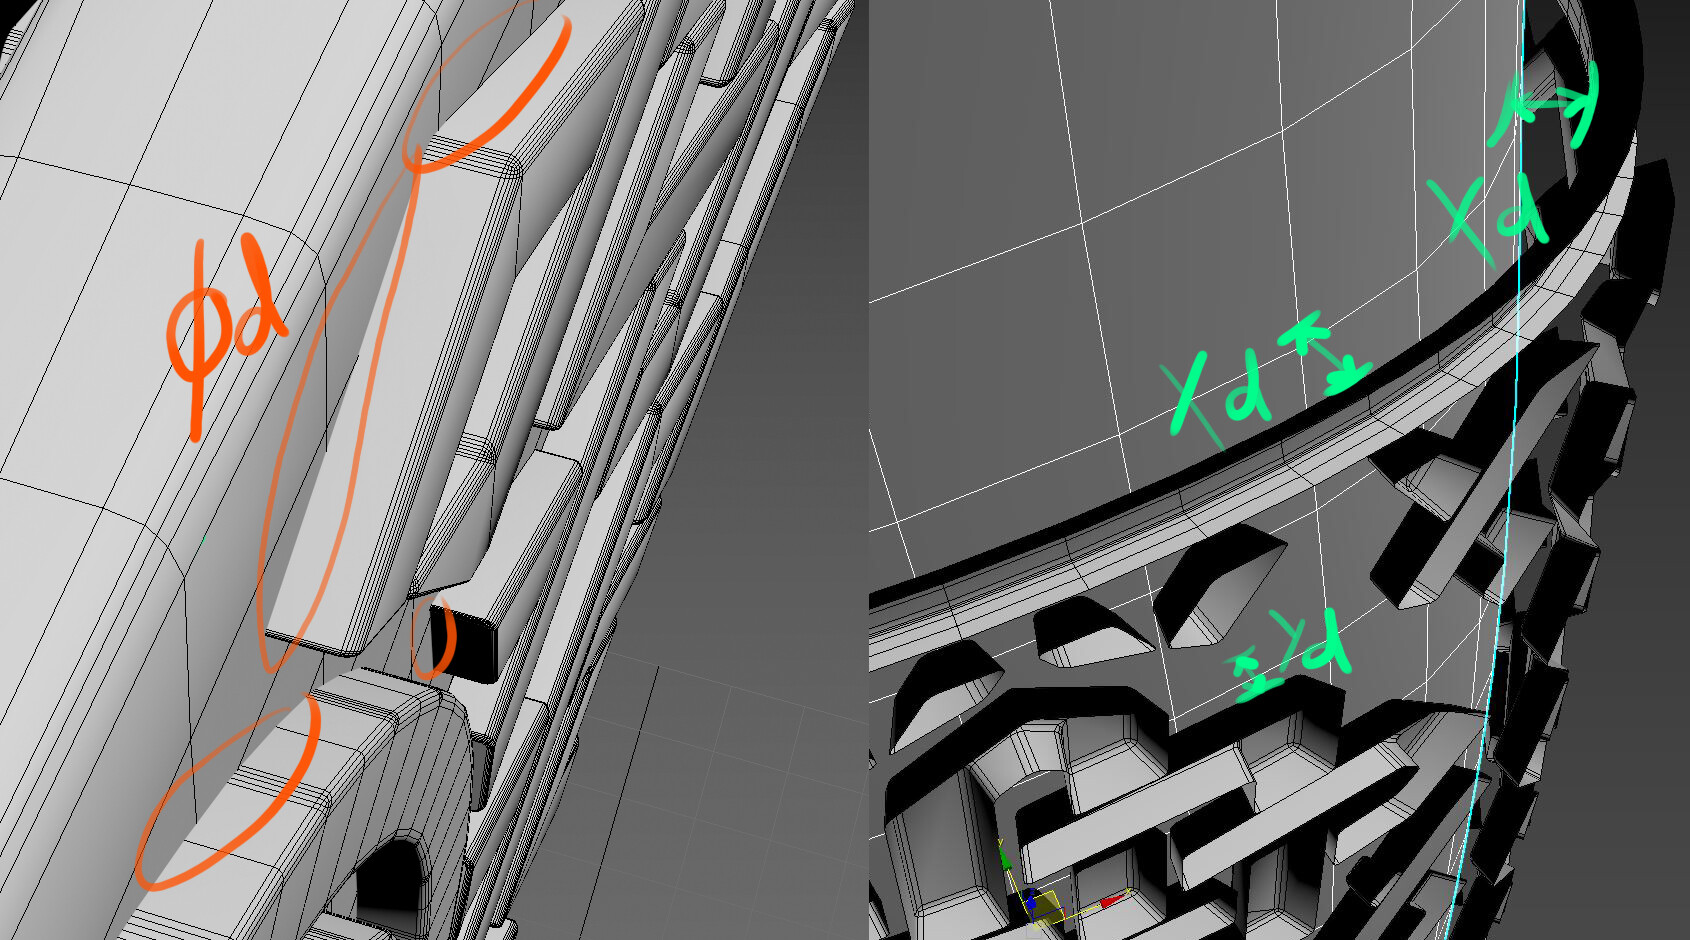
Floaters, as the name suggests, tend to be "floating" at a distance X, or Y -whatever-, from the mesh we want the details on. BUT they can also be intersecting the main mesh. So, they are called floaters not because they are at a certain distance of the mesh, but because they are separate elements with no vertex and edges shared between main mesh and them.
To know how much we can separate the deepest part of the floater on a concavity one, or how much far we can get on an extrusion detail, we must understand first the baking engine we're going to use. But don't forget that it's very important to attach these floaters we make to the main mesh which we want them to add the detail, if you use the "Bake by mesh name" of a software such as Substance Painter, Marmoset, etc. While if you bake the object as a hole, you will be exporting it as a single mesh or as many meshes under a single .obj/.fbx.
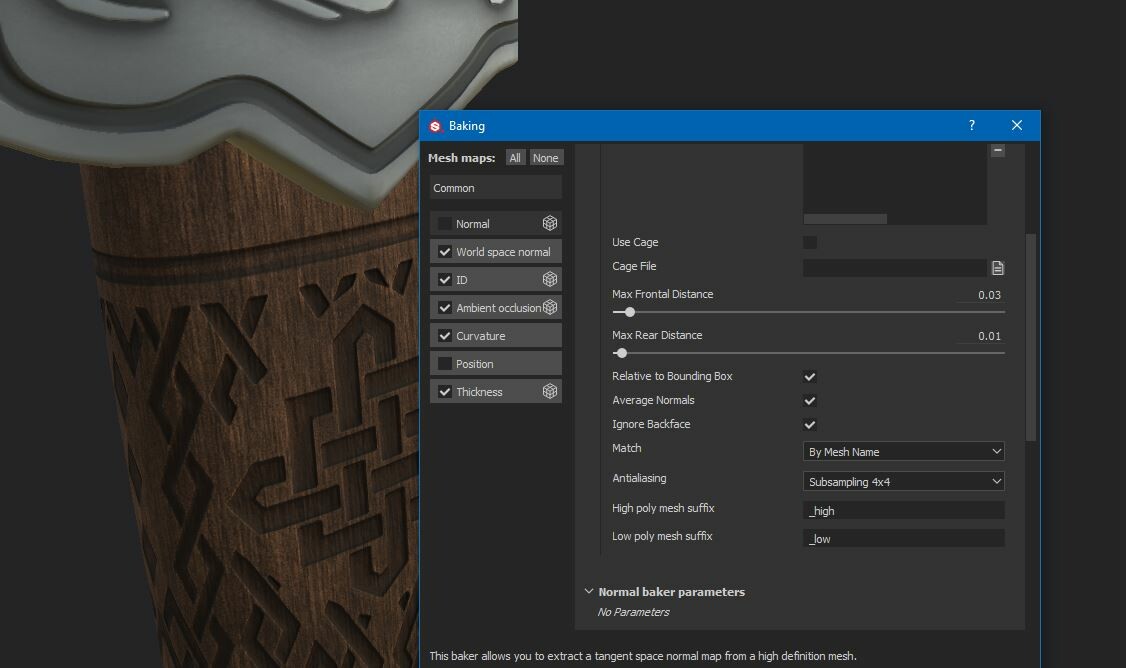
As an example, I'm going to talk about Substance Painter. For most of the bakes I've done in 2 years, I use a distance of 0.03 in Max Frontal Distance. and barely use the Max Rear Distance so I leave it that way. Why do I barely use Rear Distance? Because my holes are mostly always floaters, that's something that will be in front of the mesh and therefore only calculated by the frontal cage. As for the Max Frontal Distance, in case the bake gets issues we will alter it most of the times to a little higher value. On those cases, the issue might be that the cage is not getting as far as the details are going and this is the reason why I tend to put the details really close to the main mesh.
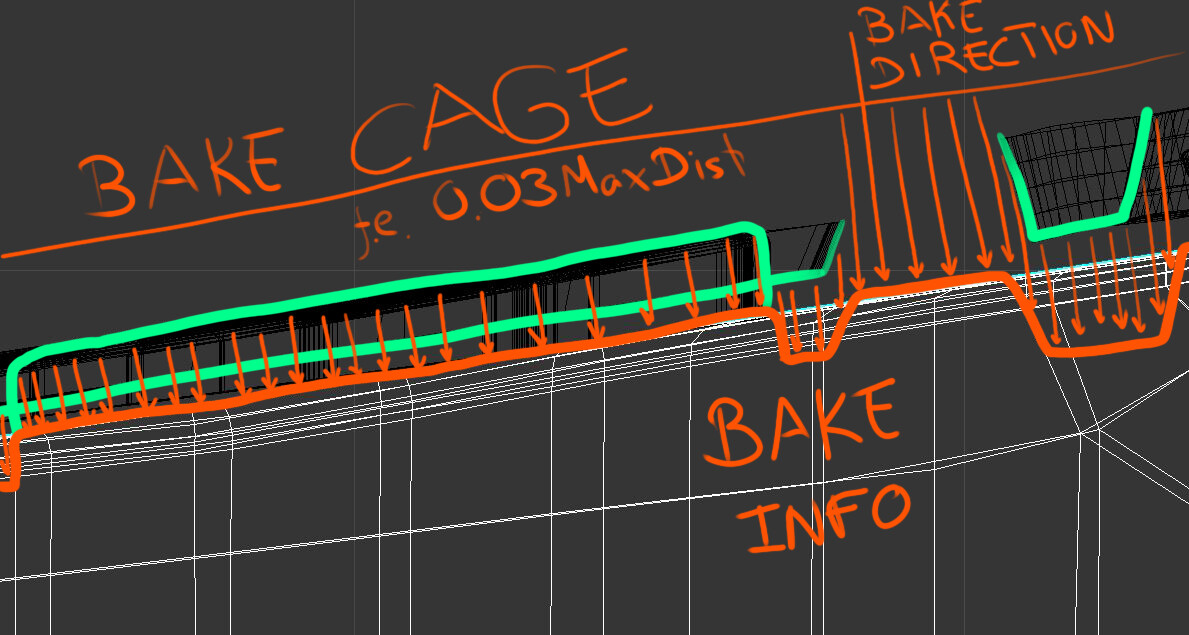
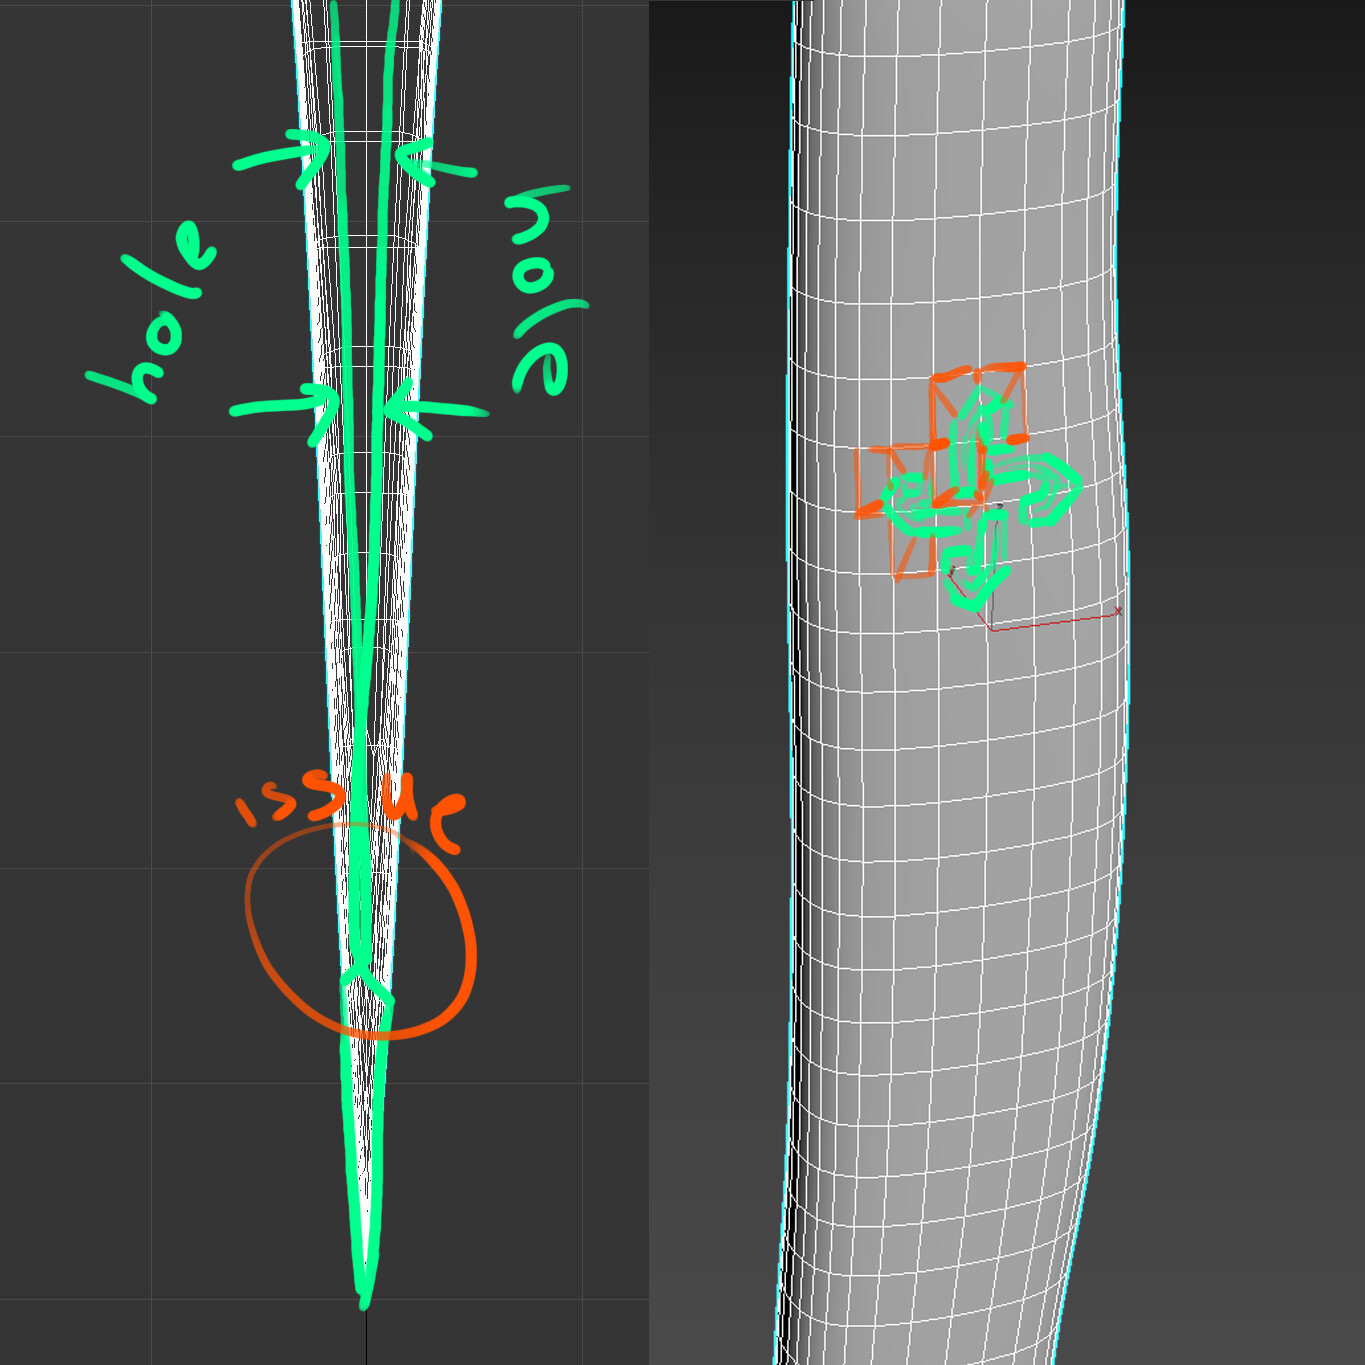
It is really important to understand how the bake works also. This image above is a Z-section of my axe blade model. Most important of all, is to understand that the bake will only take information from the farthest point where a mesh is. On the left part of the example above, we see in green two overlapping elements, but only one surface is further than the other and that's the info the bake will take. Also, another important thing to understand is that where the bake doesn't find a floater info, he will just interpret it as a "plain" area or the "0" distance for the normal map, as we can see on the right side where there are no floaters between those two.
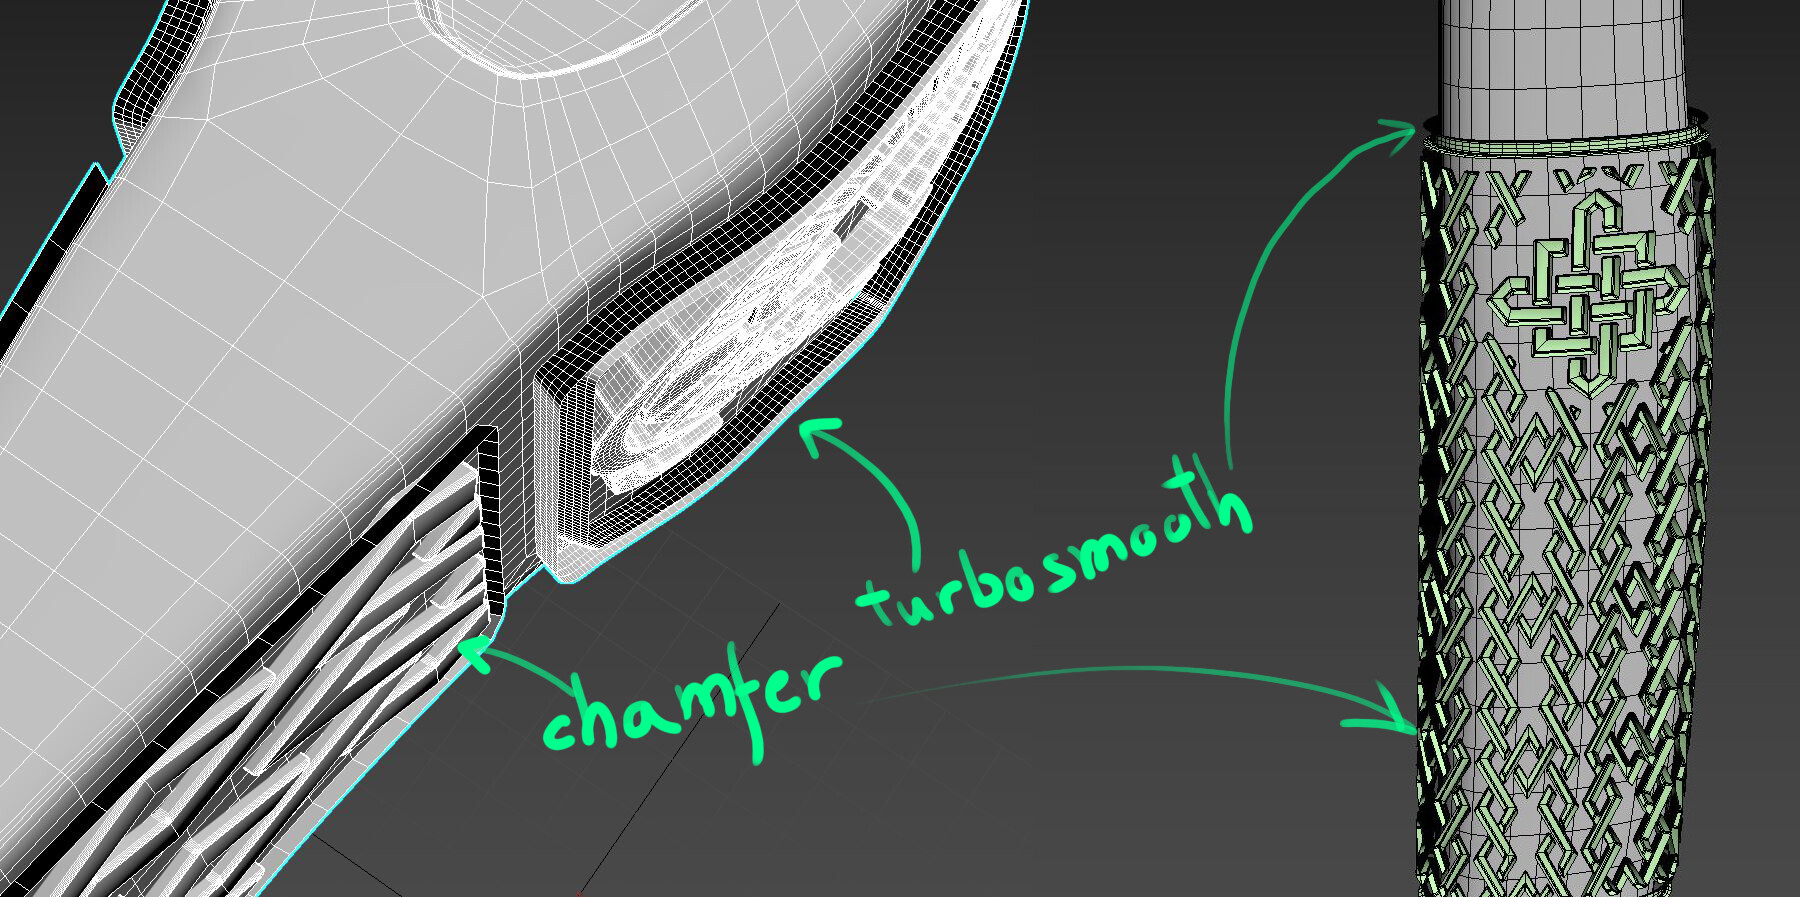
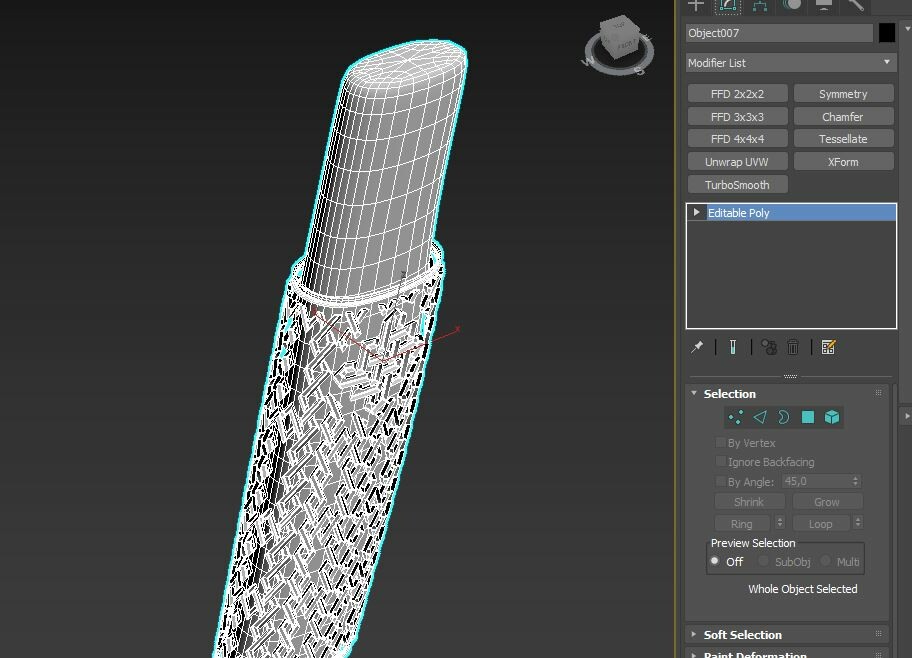
Another dumb but important fact is that floaters, as they are commonly worked on a separate mesh and later on added to main one to bake, can get many different modifiers that the main mesh didn't get. Main mesh maybe doesn't need a chamfer or a turbosmooth but you need those details an extra modification to look better, add them without caring much about how those edges will integrate with the mesh, because as we have seen there's not such intersection we need to care about polygon construction.
Last but not least, I just want to remind you that as I have said previously there are limitations to normal or bump maps. If it feels too plain, you should probably go for a real extrusion or hole in the lower poly version! Magic has a limit ;)
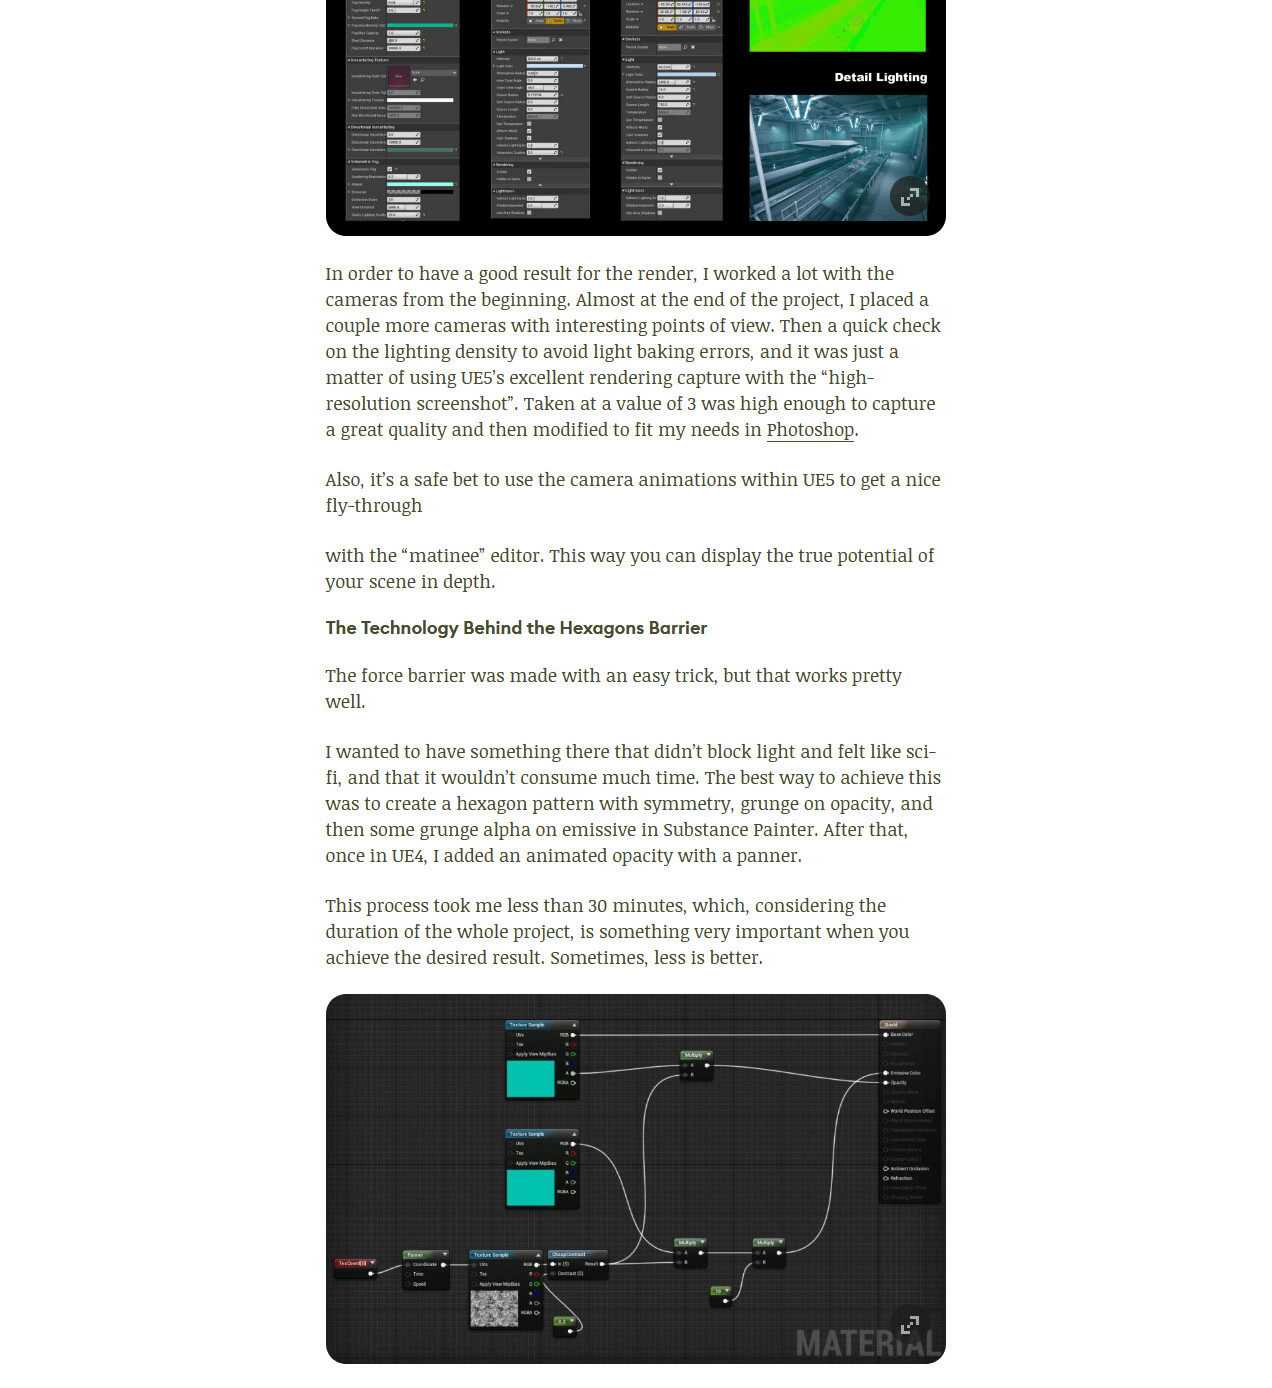
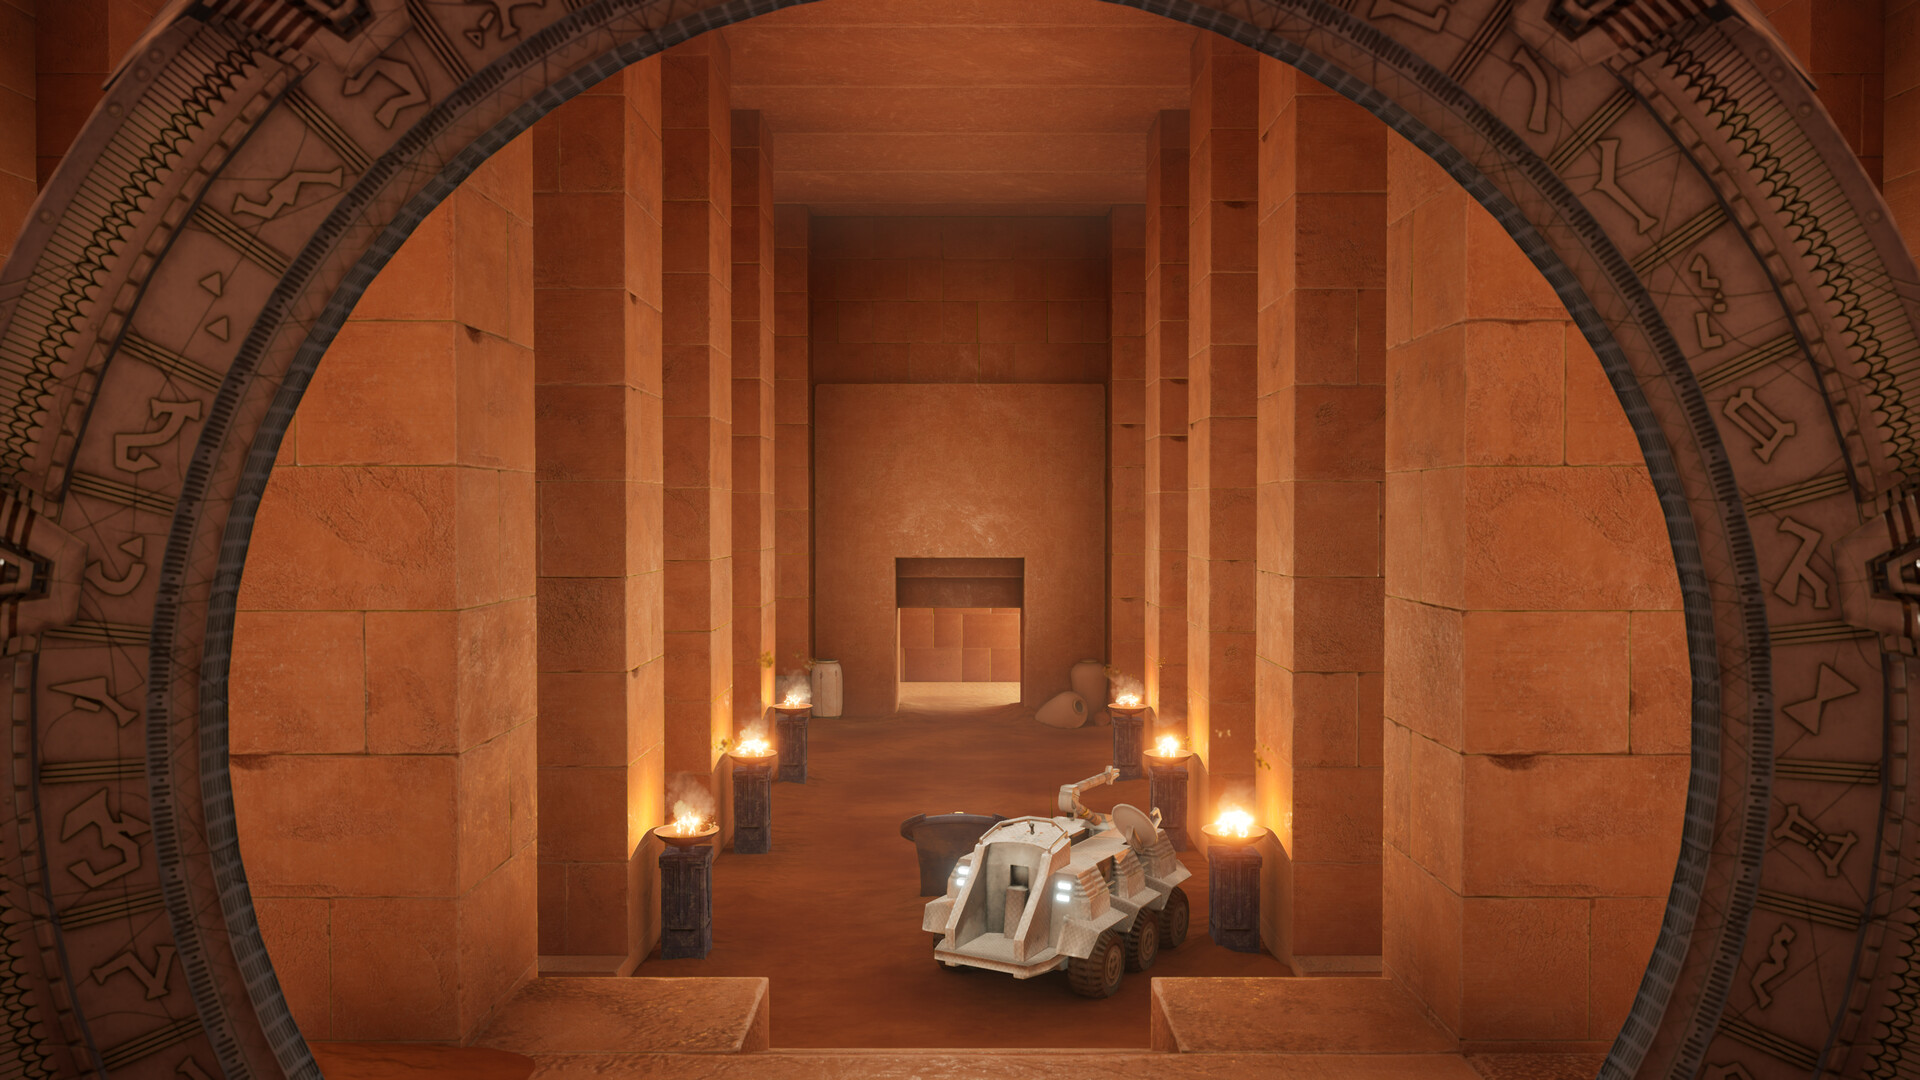
It's been a lot since I last posted a blog entry on this project. Many of you could see it finished (partially, still need some things here and there, but I'm very busy). I did create some props like some vessels, supply boxes, wood ladders, and placed them around the hall.

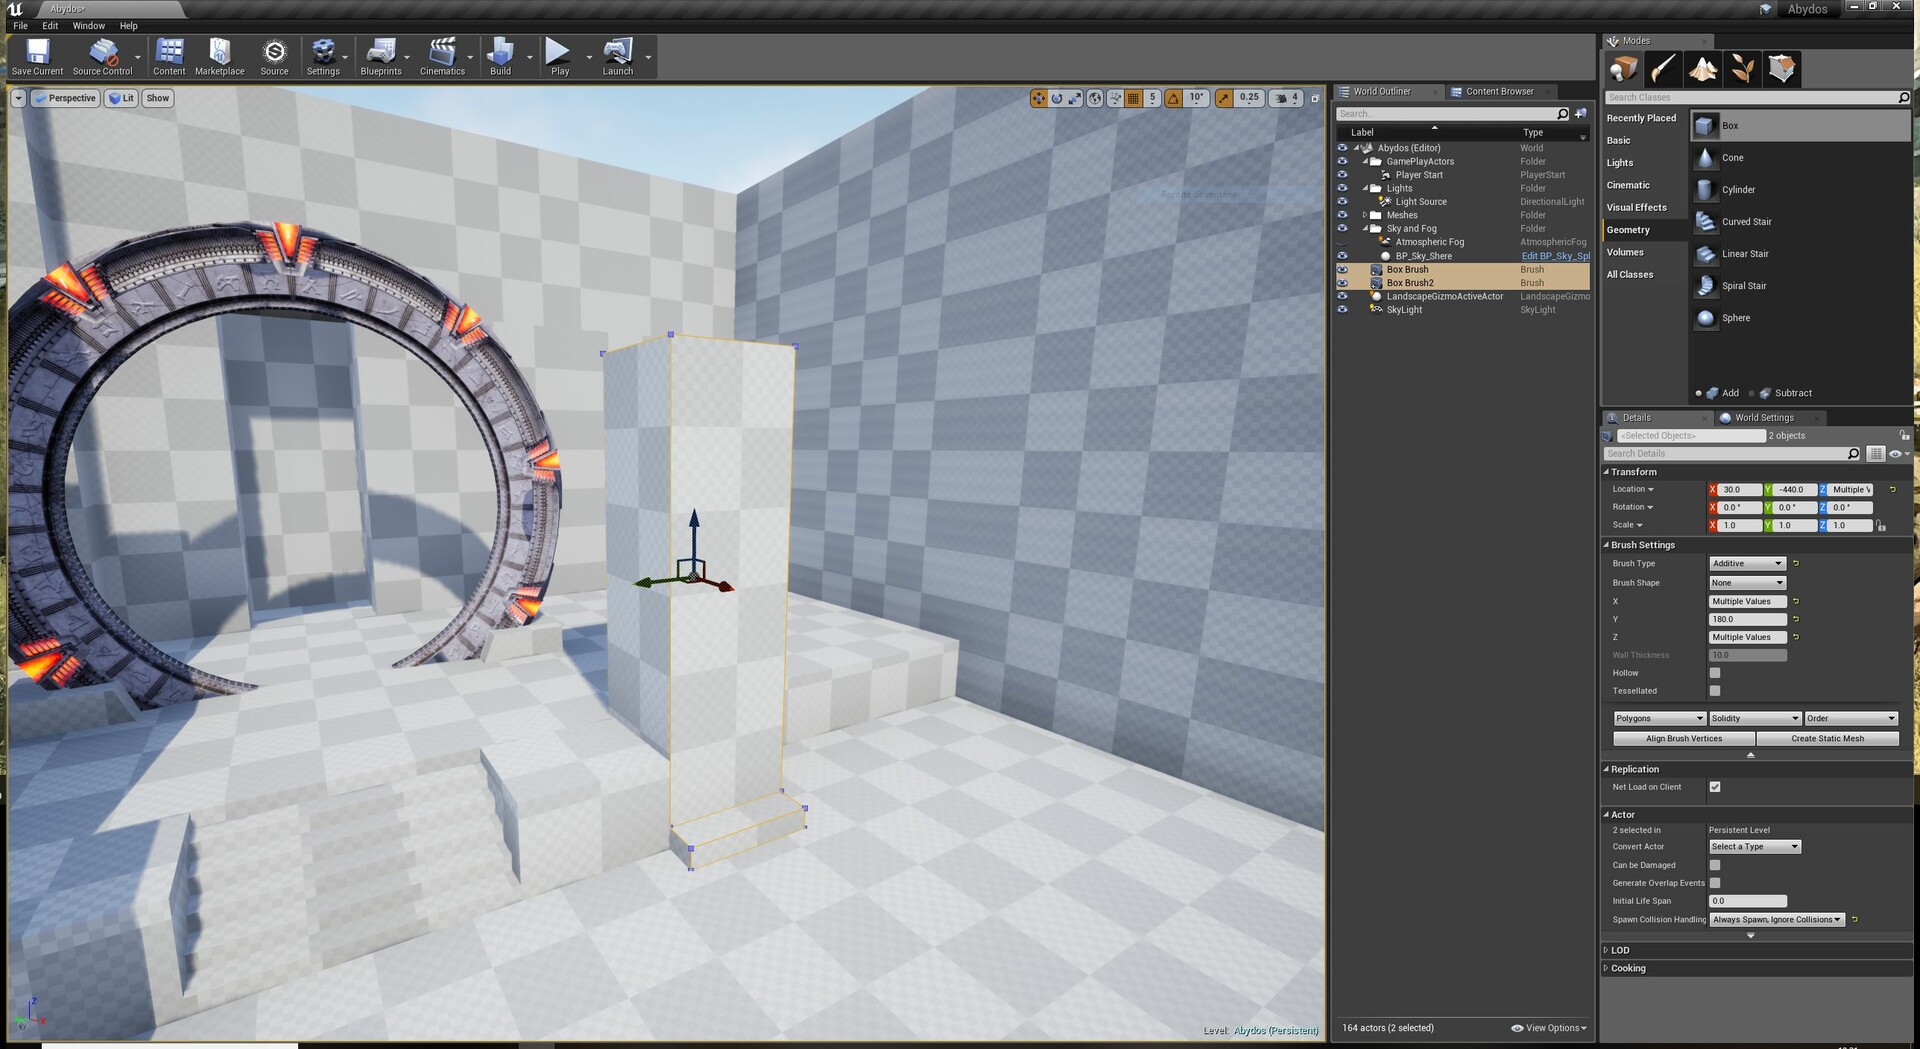
But then the light began to be a real trouble. As you can see on that screenshot, it went through walls and also other stuff. No one on official support forums nor FB pages could find a solution as I had everything set up as they were saying. Finally a guy came and told me that version 4.20 and 4.21 are really buggy with building lighting on CPU (default method) and gave me a plugin link so that Unreal Engine could bake with GPU instead of CPU. And the result was epic, after weeks of tries and failures on that, the problem was not on my side.
Here I give you the plugin link, in case you ever get the same issues: https://forums.unrealengine.com/development-discussion/rendering/1460002-luoshuang-s-gpulightmass?view=stream&fbclid=IwAR2fv5GJoRpp7s7jjozTvfKnPnfgzp7-94Kfg5xgMmxyQylC8N2mevZpxtI
Next move, whenever I get time, is to alter the rocks patterns and apply some decals. See you around!
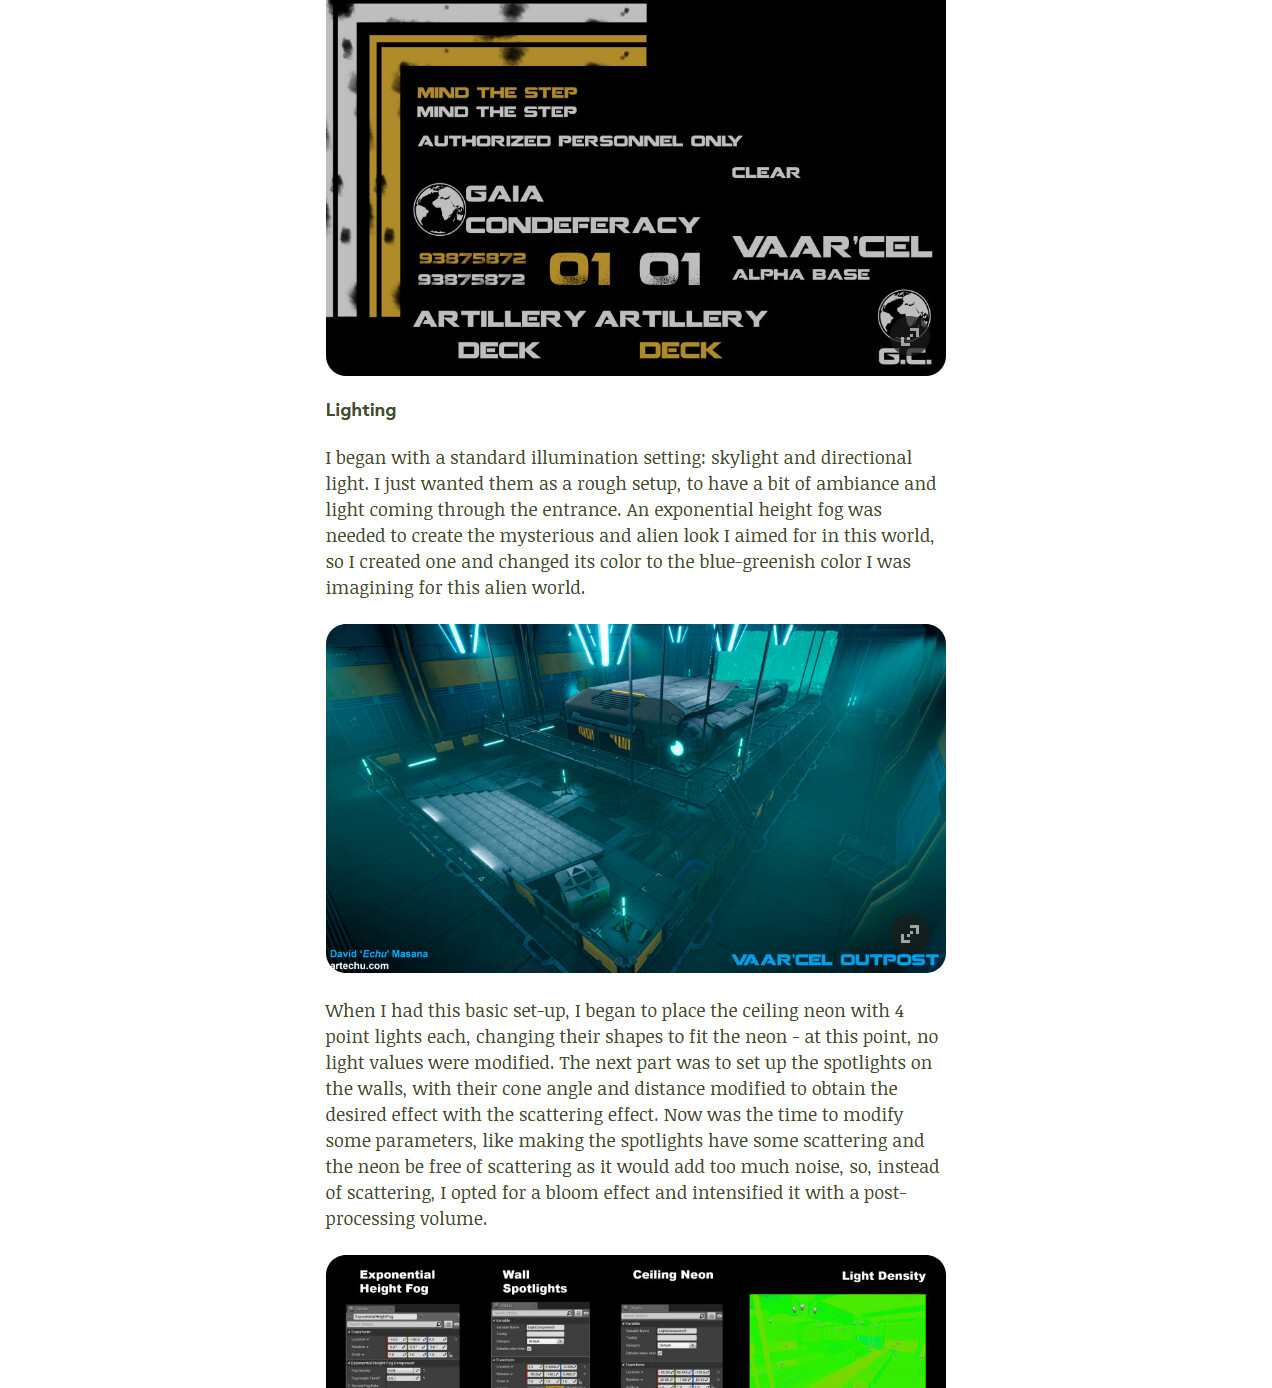
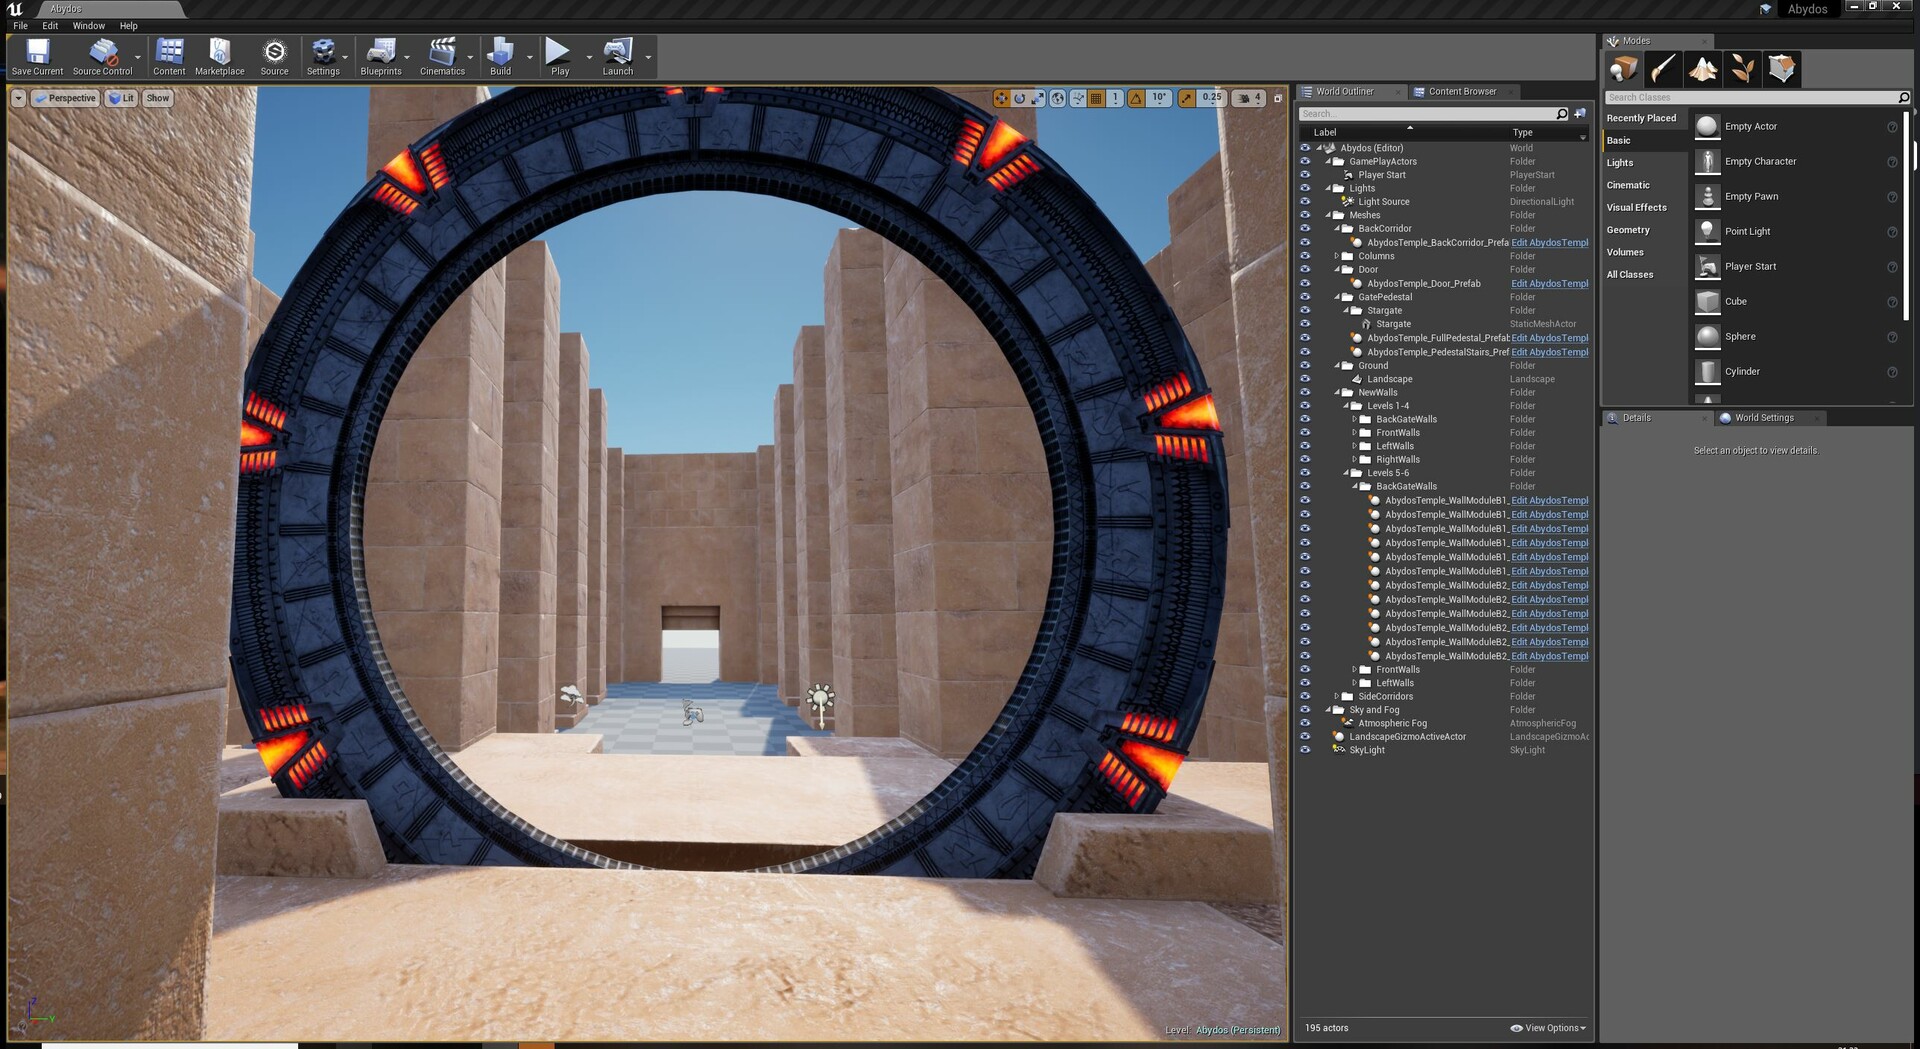
It's been a while since I posted the last progress entry on this blog. So let's recap what I've achieved so far. For example, I made modular ceilings and a different module right above the Gate with holes on it for the light to enter just as in the film and TV Show.
Then I studied a bit of landscapes in UE4, and learnt about the landscape material and how to paint different layers (I discovered I couldn't paint 4 layers due to the maps requirements tho). So I created 3 materials with Substance to paint the ground and then I gave it a bit of shapes where the ground had mounts of sand.
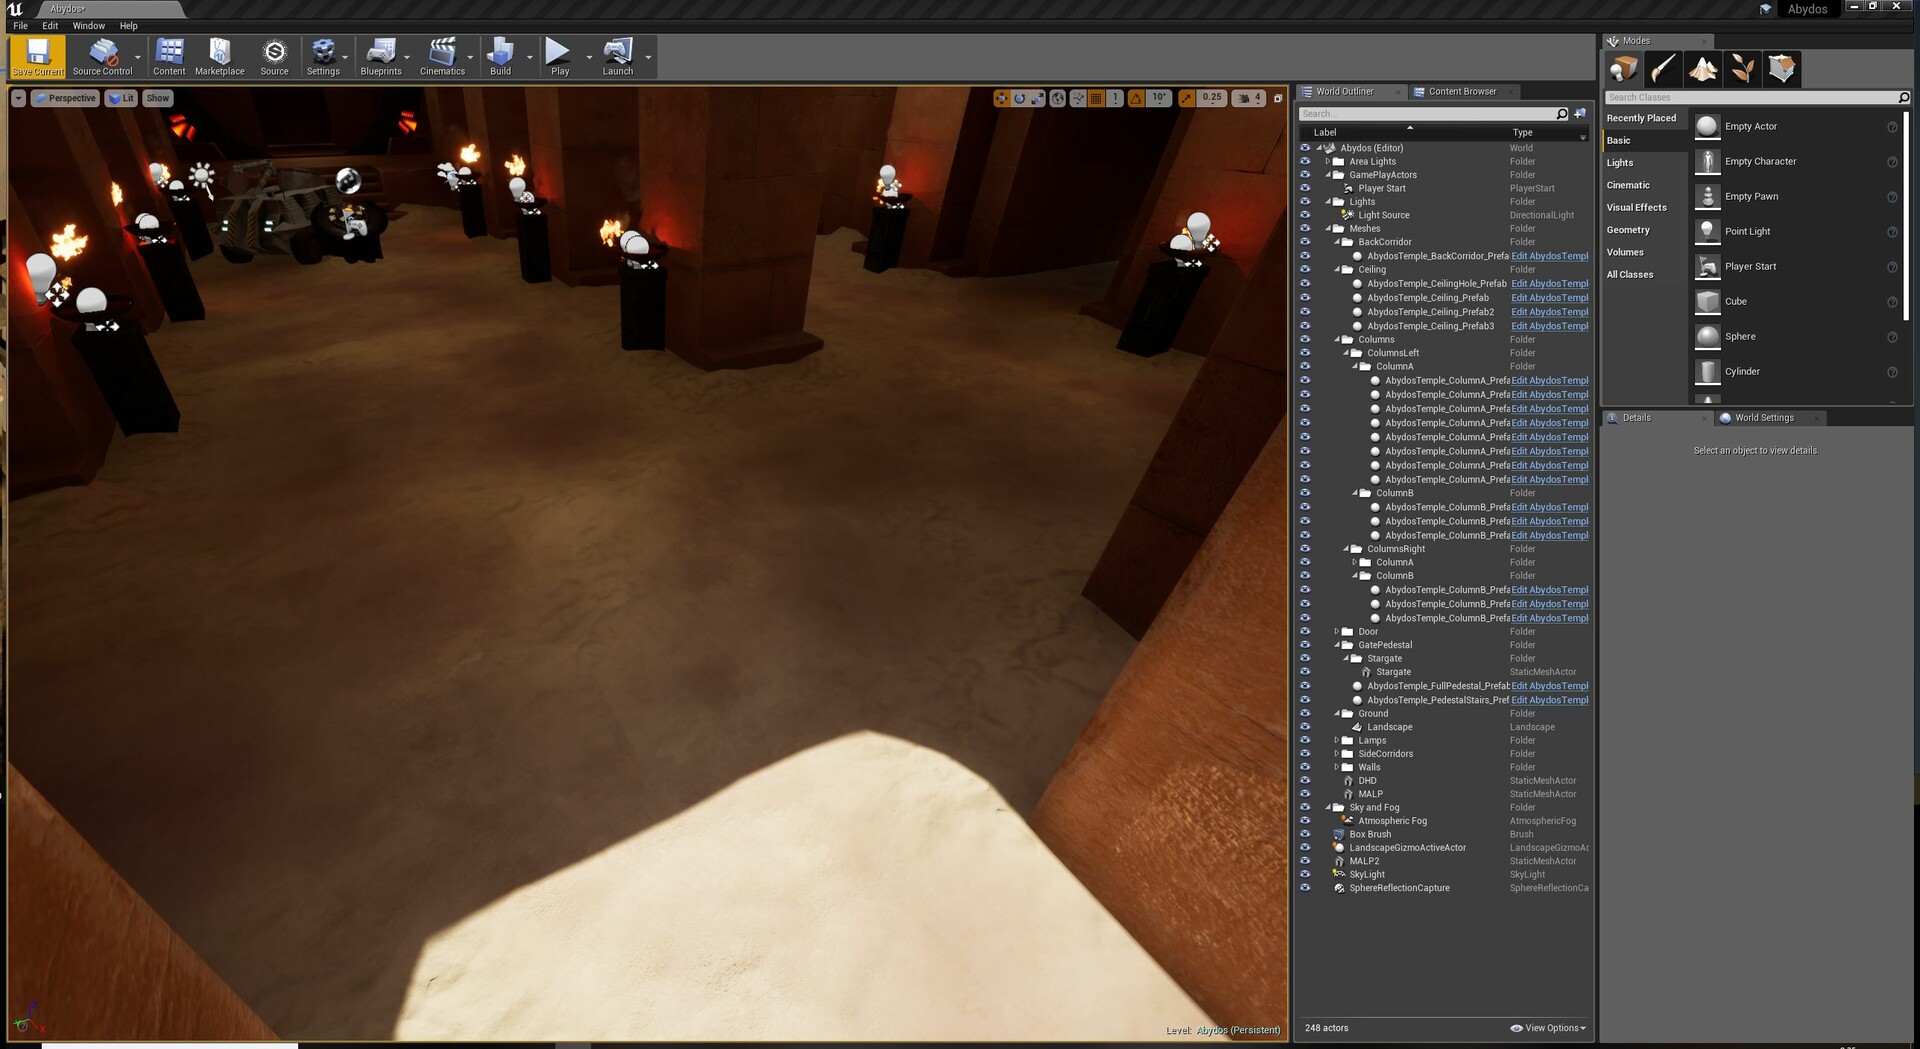
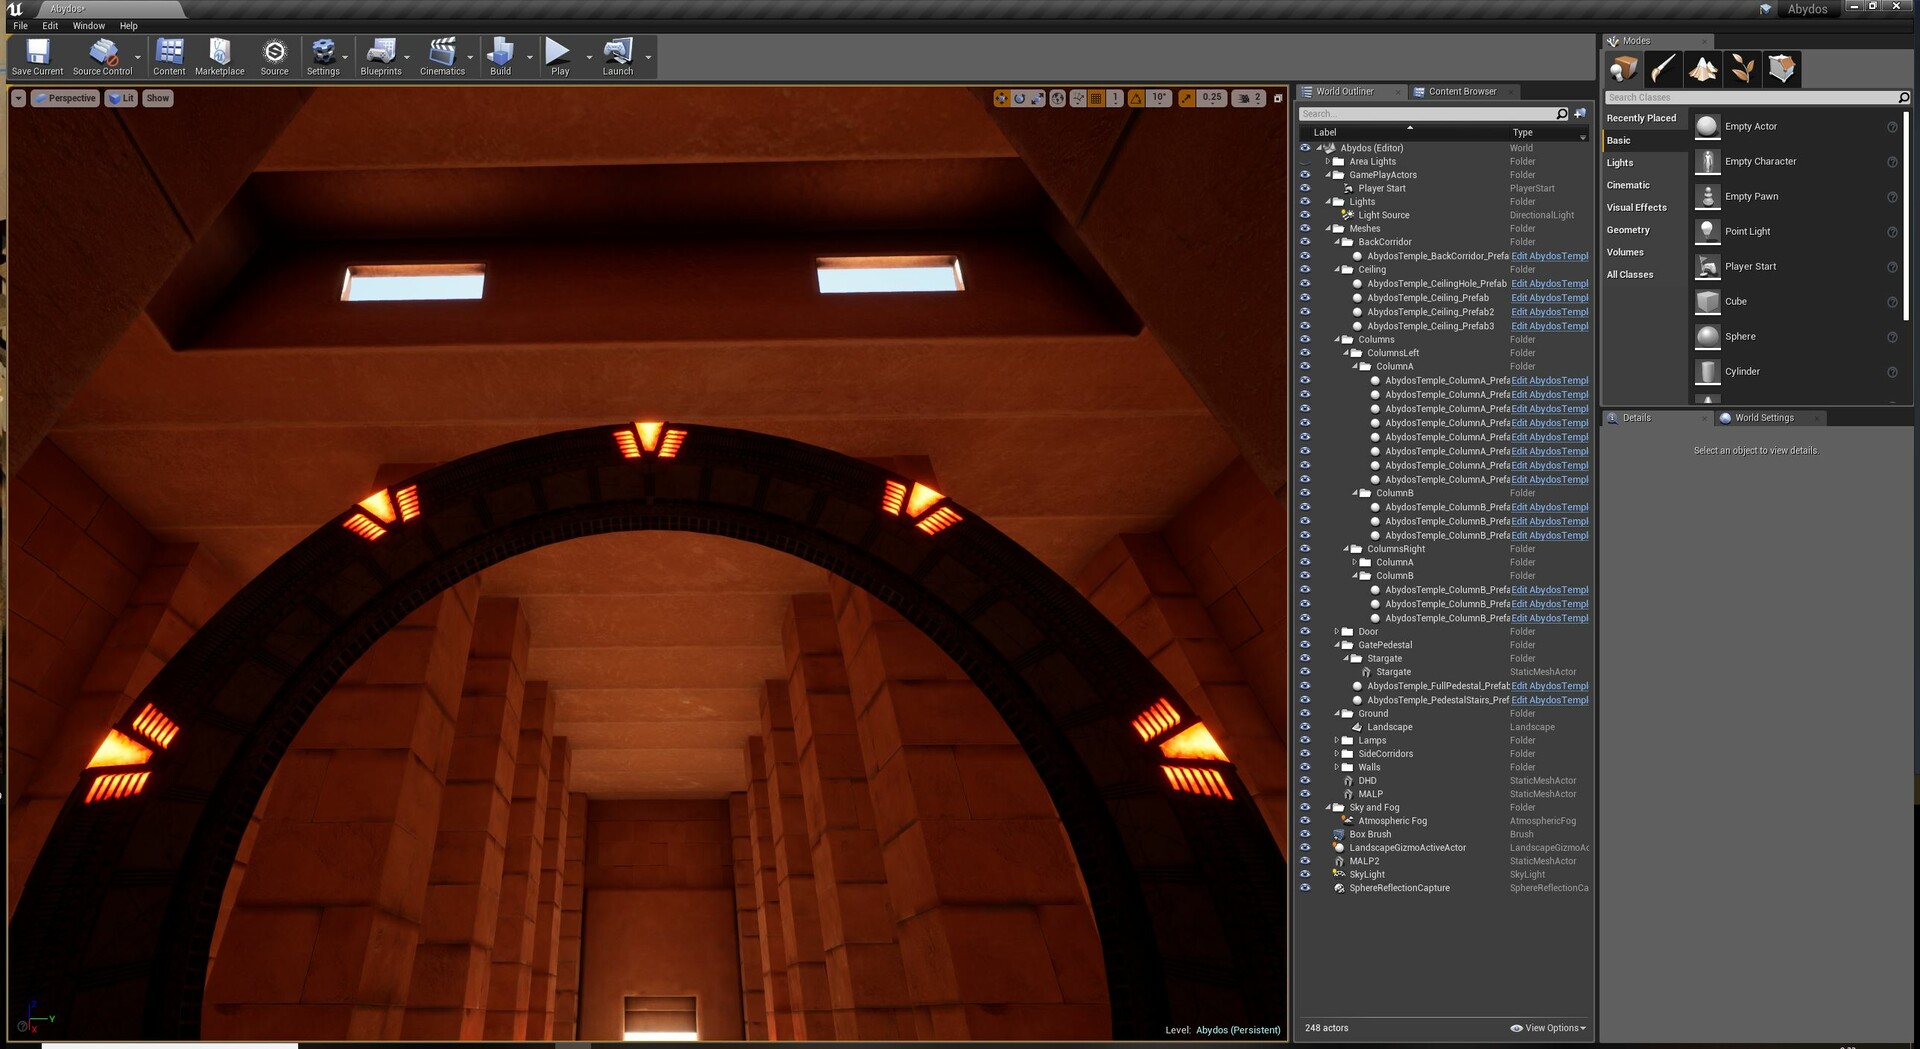
I went through a basic interior lighting with a bunch of point lights set through the temple. Also, I implemented the temple lamp i had made, and attached a Fire Particle System that came with the Starter Content in UE4 project. I still have to play more with it to make it more realistic, but at least with particle lights I made it more homelike -if that's possible for a Goa'uld temple.

Next things will be deco props.
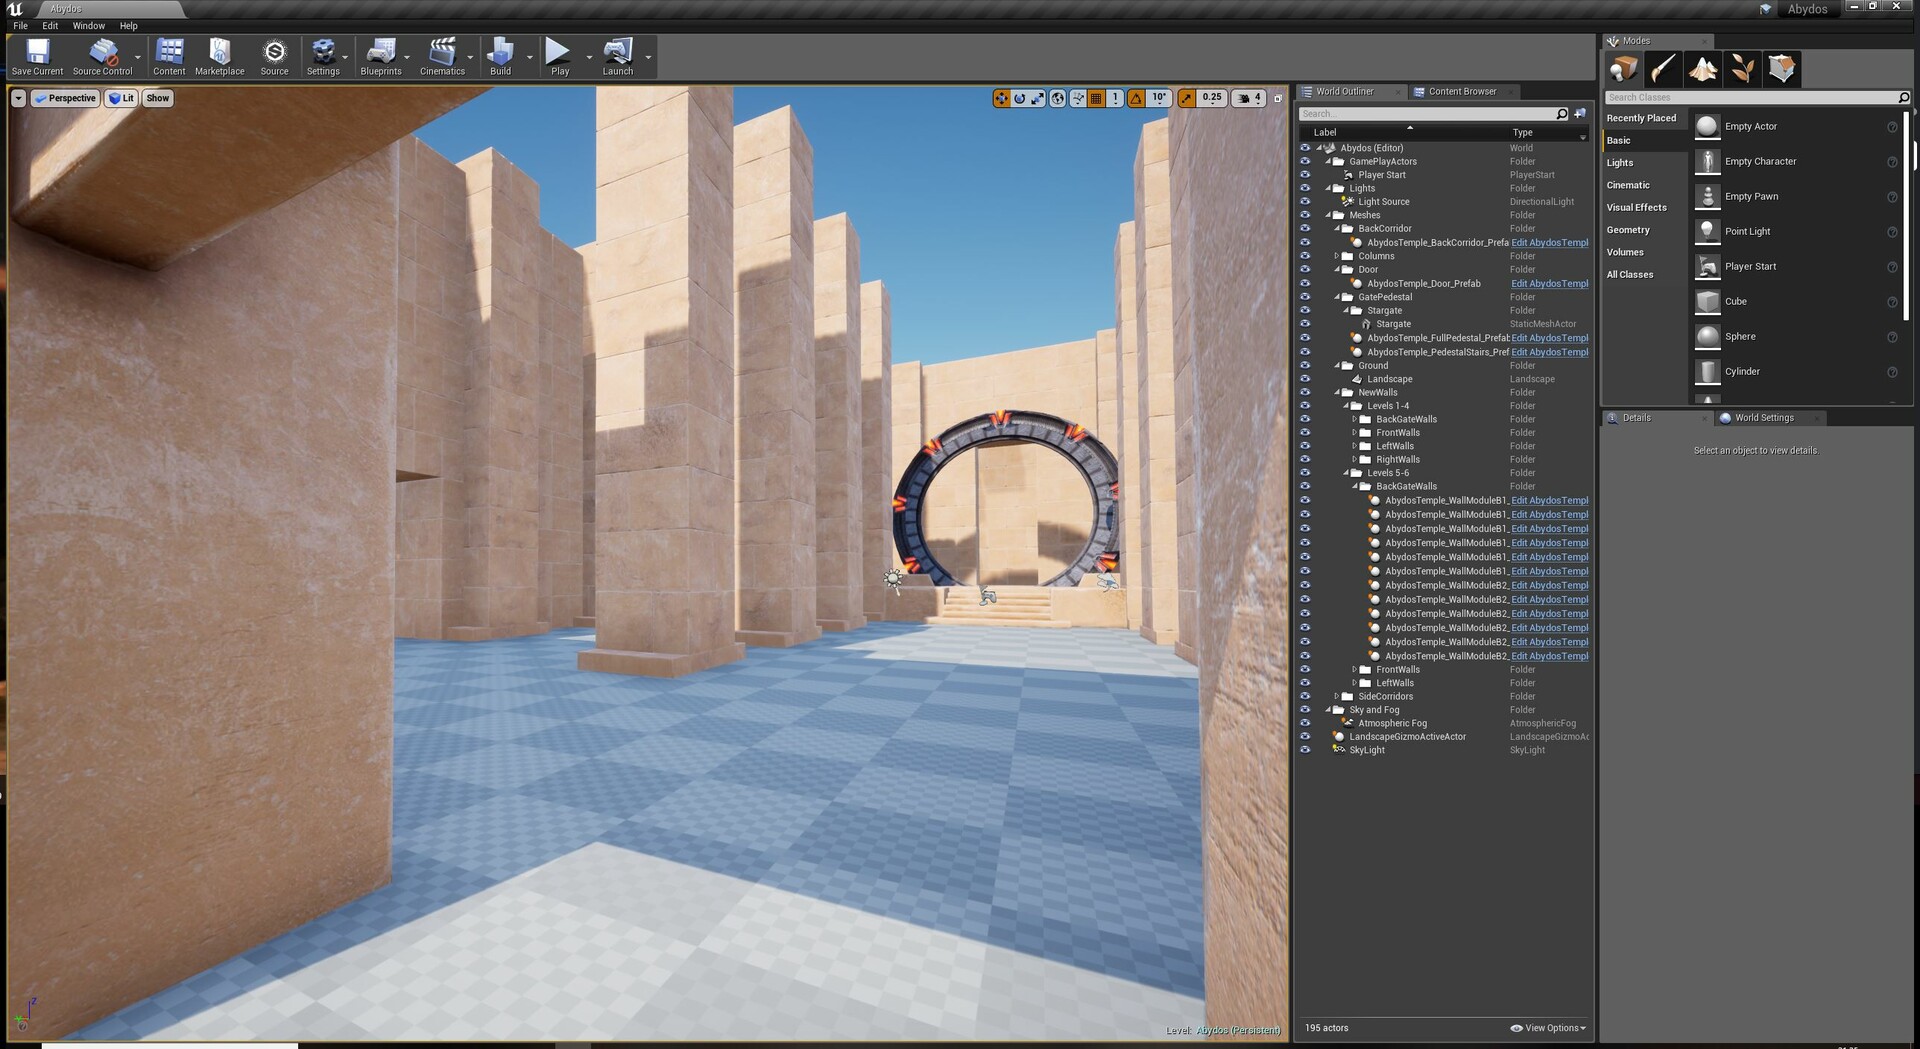
I began to think about how to make the walls modular. I exported one of the wall modules to 3DS Max and then split it in two the height, as I thought the rocks had to be big enough for a temple. Then I made a pattern consisting of 8 different rocks in size. Once texturized, They were brought into UE4 as single meshes, to edit them within different prefabs to alter the patterns of each wall module made of 2 levels of rocks.
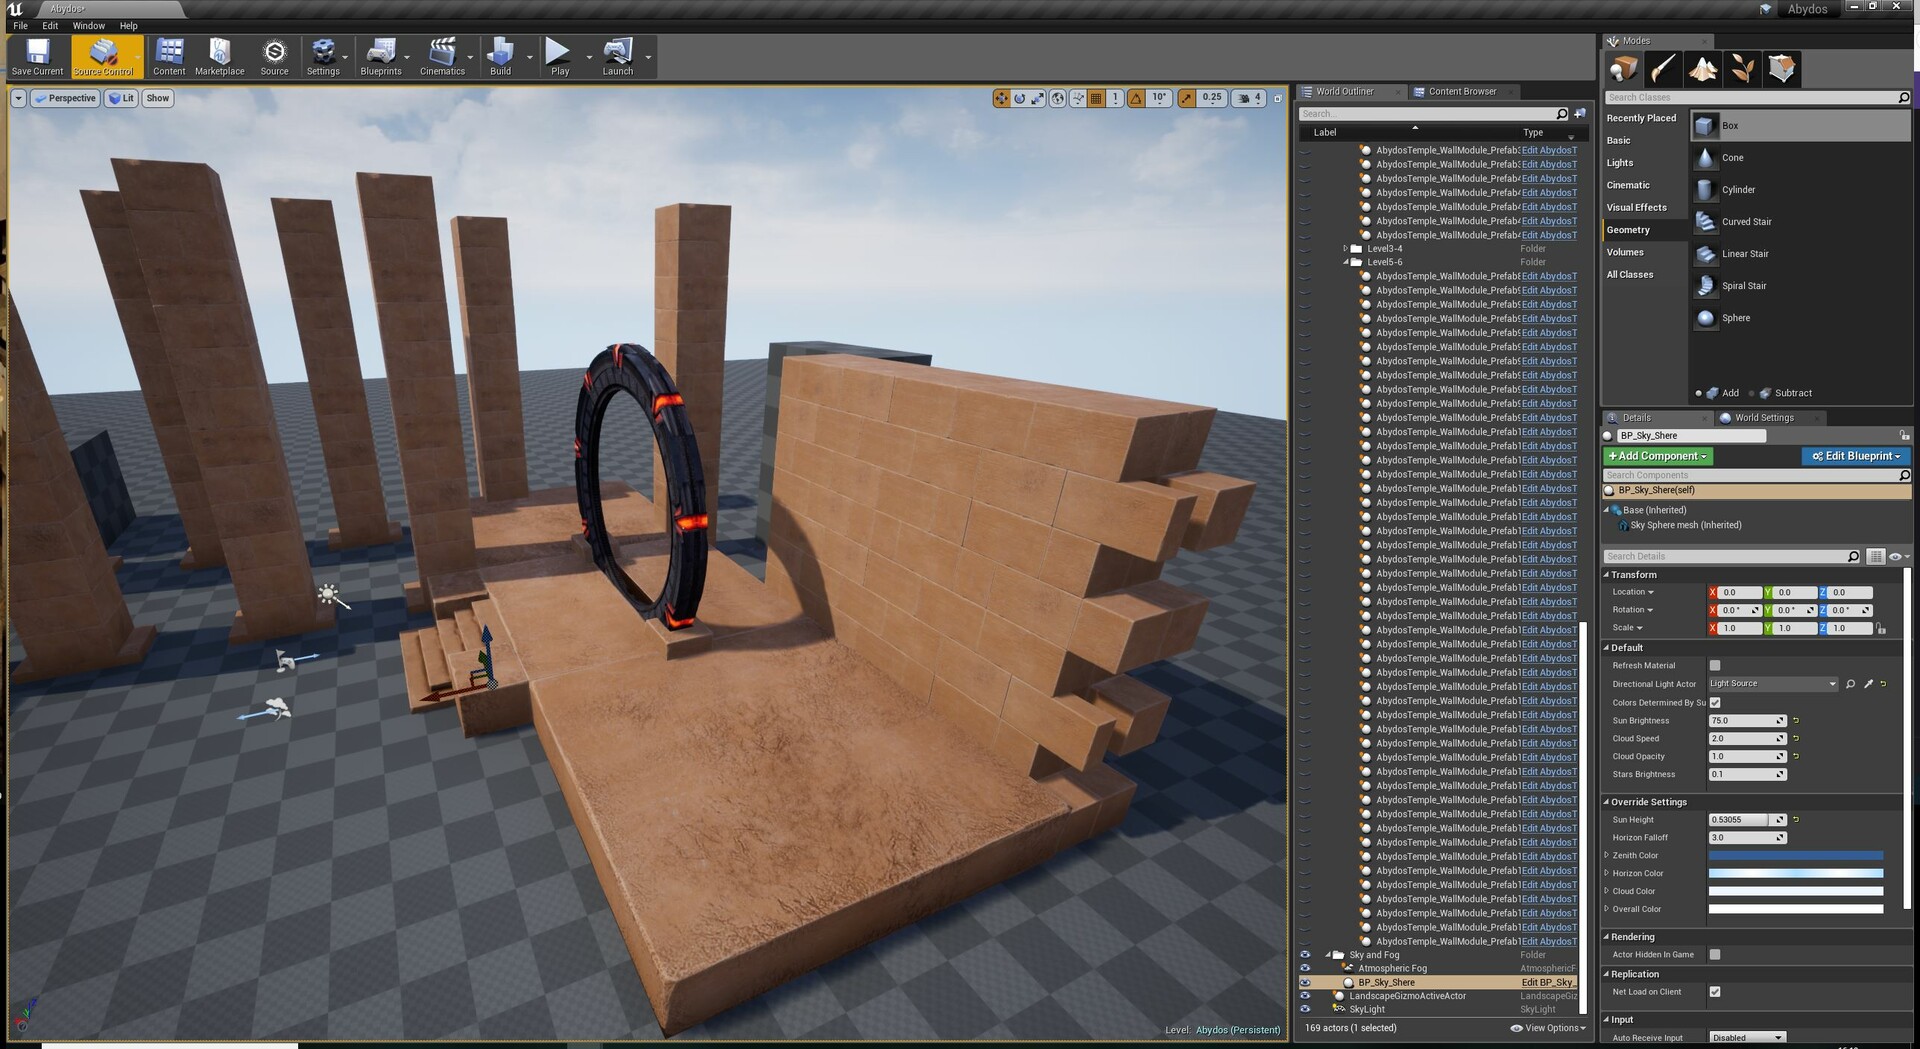
Then I just had to duplicate and place the other walls, following the old wall mesh pattern, and also duplicate in height direction. In order to deal with some gaps I placed Prefabs on the corners too, which will be editted after, removing unnecessary blocks.
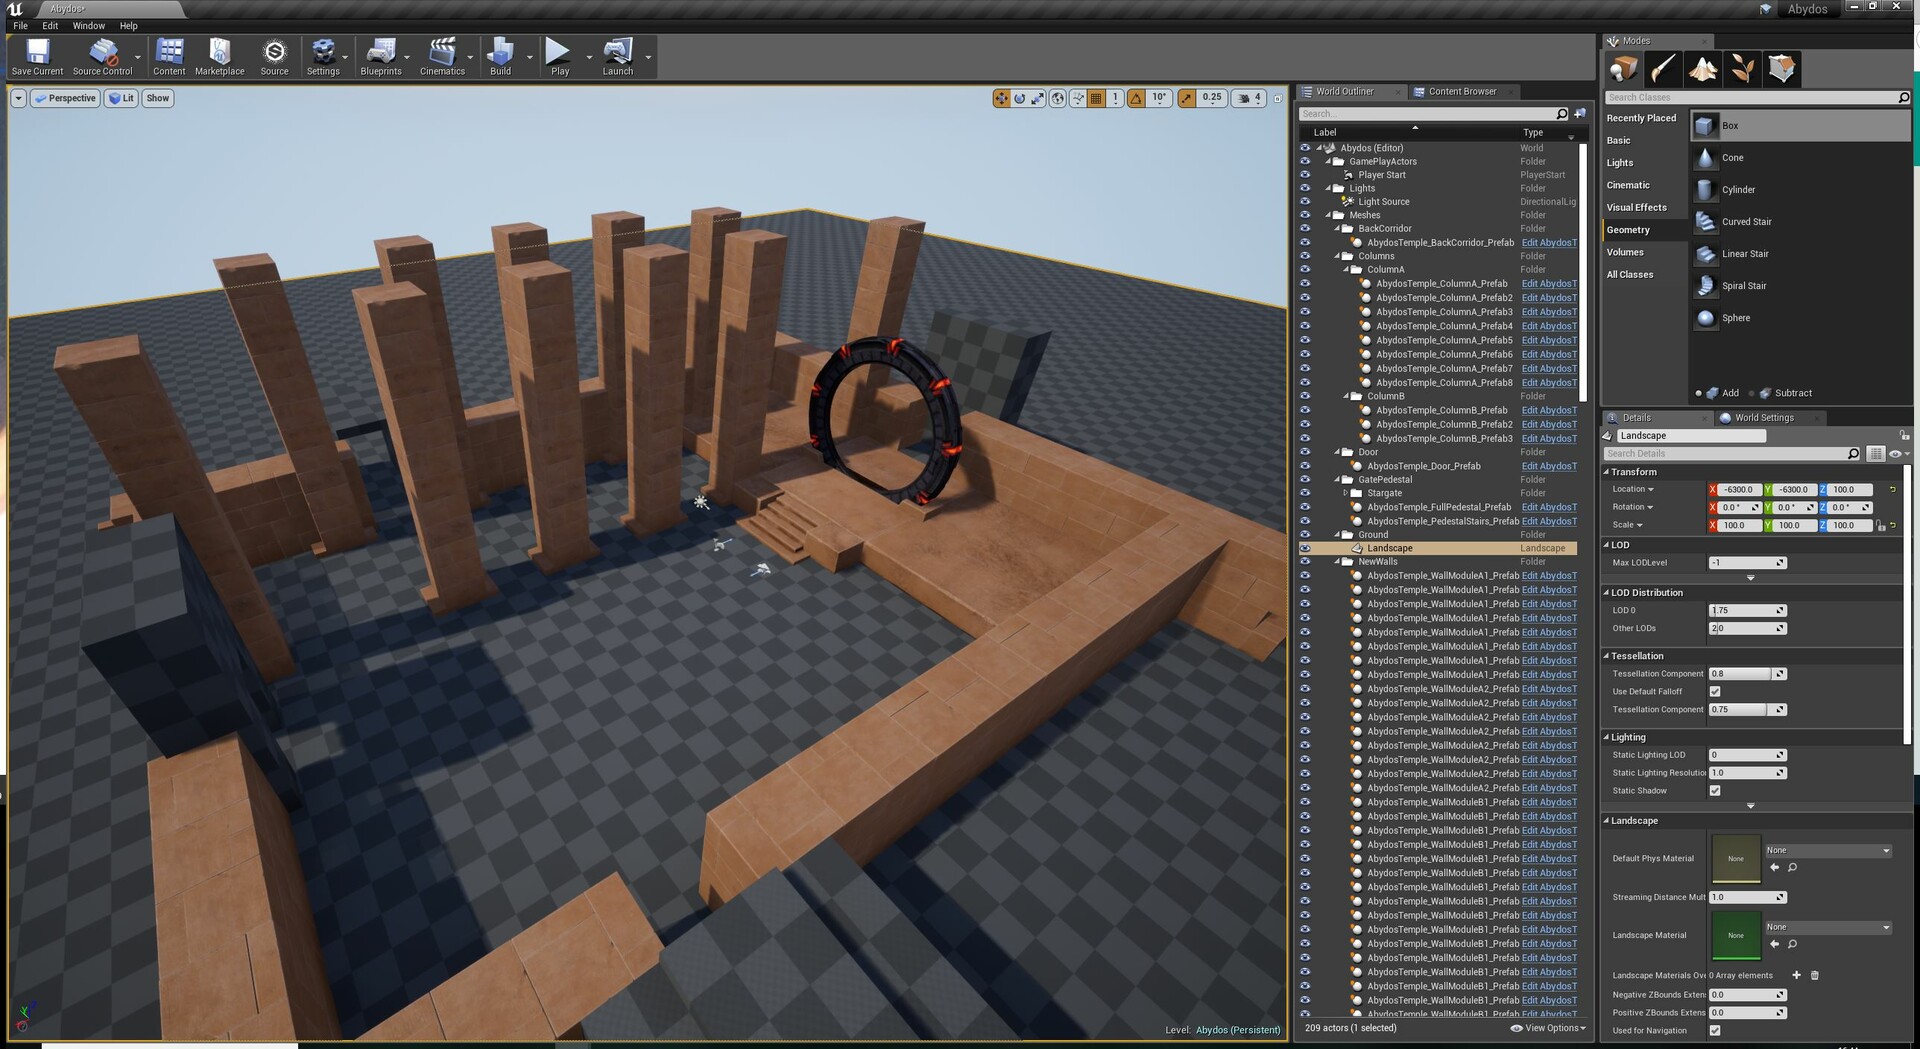
Finally, made the Main Door and and the side corridors until I had the complete result except for the ceilings.
Next steps are the ceilings, ground and lighting.
The first day, had all the rough meshes sent to 3ds Max. Once there, I separated in layers to work better on each one of the props hiding the others faster and having them more organized. The first try I made was with the columns, where i made a sketch of the rock blocks pattern.

Then, I took the 3 different ones (although all were different in size) to work on uvs and high poly. I did a small chamfer on them to add that extra bump detail later on. I wanted to work with them 3 at same time, so they shared same UVs map and material.

Once I had UVs and High Poly made, I went to substance painter to create the material I'd use for all of the rock materials in the scene. I gave them a an Egyptian Sandstone look. Added a bit more of darker tonality in the concavities, and then saved the layers as a new Smart Material ready to apply on every prop needed. Then I exported the maps, to import them inside Unreal alongside with the mesh.

The columns prefab was made of 2 column parts and one column base, once I had them both I edited the prefab swapping the basic meshes with the new detailed ones. I still don't know why it happened, but when I exported in cms (and worked on same units in 3ds Max) when importing back to UE4 it didn't have the expected size. But I found fast enough I had to scale props to 2.55 in all directions.
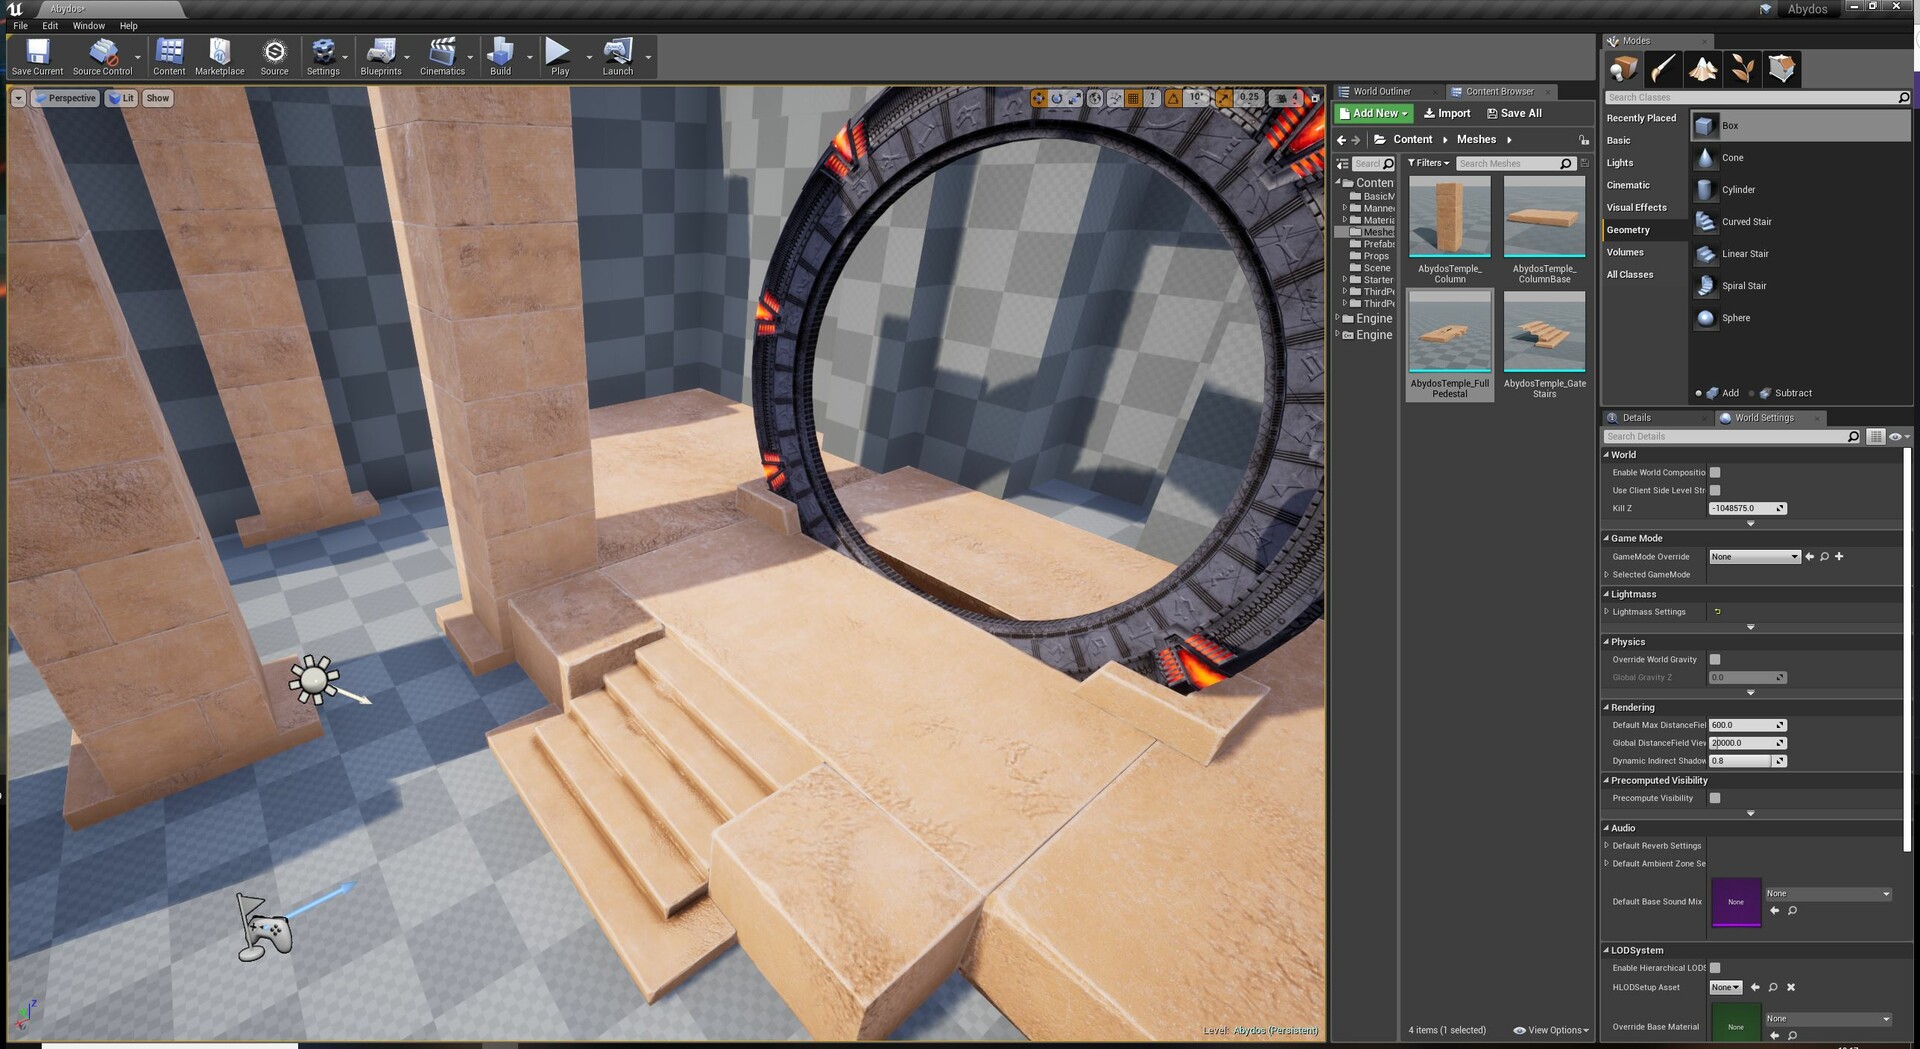
Once done, I moved to other props, bigger ones, as the Gate pedestal, stairs and rocks on both sides. And it started to become alive! Next day will be about walls.
After a year of learning UE4 materials, and trying out some personal level designs that failed badly because of lighting and some bad concepts I had of level design in UE4, I'm gonna start this project from scratch.
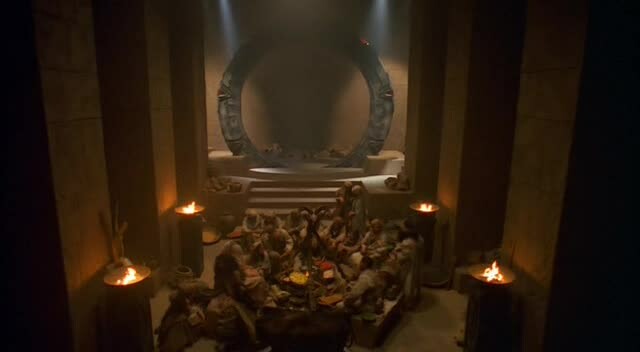
This is a project that started a year ago, when I made the Stargate, DHD and a MALP props. I thought: "Hey, wouldn't it be cool to replicate some of the iconic environments of SG-1 while you learn?". And so I did. I thought I learned enough at my master's degree, to make it so, but knowing Unity is not knowing UE4. Besides, I had still to learn a lot of many other hints and tips I've been gathering throughout a year.
Therefore, I began this level design with a rough blocking with BSP boxes, to get the Abydos Gate Room done. For me, a hard-die fan of SG-1, it was a nightmare to see that Abydos Gate Rooms I had as references from both film and TV show was a lot different in proportions and props. Even within the TV shows, the temple changed from season 1 to 10! That's why I finally decided to take it only as a reference, but with free moves for proportions and positions of elements such as columns and corridors.
I finally learned the use of Blueprints as the Prefabs Unity has. I created all the prefabs (basic ones, will extend different versions of each to add more variety) and learned to export them to 3ds Max. This is something that I never thought I could do if I still used Unity (except if you buy plugins, of course).
Once All where imported, I duplicated them on 3ds Max, just to save the rough blocks as reference of sizes. Then, I moved into the low poly and high poly versions of each.
One of the tries I gave it last year, failed because I thought I could really do it all with planes and then use bumps or tessellations to give it a good resemblance. This time, I added more polys because nowadays polys are a lot cheaper (I'm used to model for a 13-year-old fan mod of an MMO who's engine is a lot trickier). And a bit more polys is a lot better than complex shaders.
This was my truly first day into UE4 as level designer.